Blueberry Crème Fraîche Cheesecake

Blueberry Crème Fraîche Cheesecake

Taylor is not cheesecake’s biggest fan. He says that even the best cheesecake is only a C+ dessert (whereas even a bad chocolate cake is more enjoyable in his mind). And I’ll admit that I will always turn to the chocolate desserts on restaurant menus over the cheesecake.
But when I got an inkling to make a purple cheesecake, one bursting with blueberry flavor, I wasn’t expecting it to be quite this good.
To say this cheesecake was a labor of love would be an understatement. It took me 3 tries before I finally got it right (and even then I was on the verge of failure). Copious amounts of love, stress, and blueberries went into this recipe.
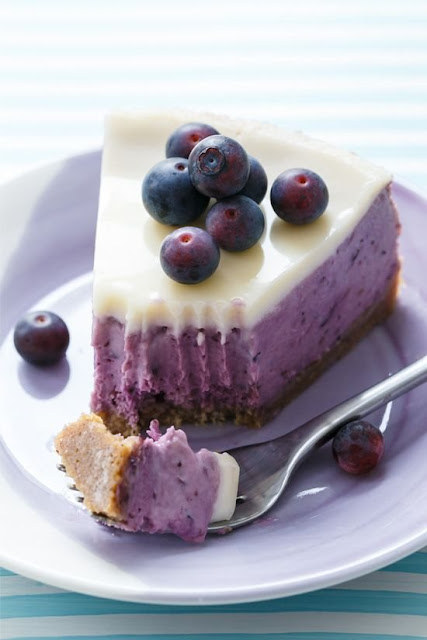
But, boy, was it worth it in the end, when I finally reached cheesecake nirvana: that moment when your fork slices through the silky smooth cake like butter, each bite stunningly purple, luxuriously creamy, with an underlying rich blueberry flavor; the perfect balance of tartness and sweet.

Ingredients:
  • 15 ounces (about 3 cups) fresh blueberries
  • 3 tablespoons brown sugar
  • 1 teaspoon pure maple syrup

For Crust:
  • 1 1/2 cups vanilla wafer cookie crumbs (from about 7 ounces)
  • 1/4 cup almond meal or finely ground almonds
  • 2 tablespoons brown sugar
  • pinch salt
  • 5 tablespoons butter, melted

For Filling:
  • 16 ounces full-fat cream cheese, room temperature*
  • 2/3 cup granulated sugar
  • 1 teaspoon fine sea salt
  • 3 tablespoons all-purpose flour
  • 4 large eggs, room temperature
  • 2/3 cup crème fraîche** or sour cream, room temperature
  • 2 tablespoons freshly squeezed lemon juice
  • 1 1/2 teaspoons vanilla extract
  • 3/4 teaspoon almond extract

For Glaze:
  • 1 cup crème fraîche or sour cream
  • 1/2 cup granulated sugar
  • 1/2 teaspoon almond extract

Directions:
  1. Preheat oven to 400 degrees F. Toss blueberries with brown sugar and maple syrup. Spread onto a rimmed baking sheet (lined with foil for easy cleanup) and roast for 15 minutes or until juicy and bubbly. Remove from oven and let cool for 10 to 15 minutes, then pour, scraping all berries and their juices, into the bowl of a food processor or blender; puree until smooth and set aside. You should have about 1 cup of puree (if you have more than that, feel free to set some aside to drizzle on the top of the cheesecake later).
  2. Reduce oven temperature to 350 degrees F. Butter a 9-inch cake pan with removable bottom; line bottom with a round of parchment paper if desired.
  3. Crush cookies in a food processor until fine crumbs; pulse to mix in almond meal, sugar, and salt until blended. Add butter and pulse until evenly moistened. Press into bottom of prepared pan. Bake crust for 10 minutes or until set, then remove from oven and let cool completely.
  4. Reduce oven temperature to 325 degrees F.
  5. In a large mixing bowl or the bowl of a stand mixer, beat room temperature cream cheese with sugar until smooth. Add salt and flour and mix well. Add eggs, one at a time, mixing well after each addition and scraping down the sides of the bowl as necessary to be sure all ingredients are evenly incorporated. Add crème fraîche, lemon juice, vanilla and almond extracts, and pureed blueberries and mix until even in color and no white streaks remain (remember to scrape the bowl again!)
  6. Pour batter into cooled crust. Place on a baking sheet and place in preheated oven. While cheesecake is baking, whisk together crème fraîche, sugar, and almond extract until smooth.
  7. After about 45 to 50 minutes, when center of cheesecake is set but still barely jiggly, pour glaze on top of cheesecake, spreading into an even layer. Return to oven to bake for another 5 minutes, then let cool on a wire rack to room temperature. Refrigerate overnight or until ready to serve. Remove edges of springform pan and slice into 16 wedges; serve chilled or at room temperature, topped with fresh blueberries or leftover roasted blueberry puree if desired. Cheesecake will keep in the refrigerator for up to 5 days.
Noted
*It is VERY important that all your refrigerated ingredients be at room temperature, this means your cream cheese, eggs, and crème fraîche. Doing so will ensure a silky smooth filling. I recommend taking your ingredients out of the fridge at least 2 hours before you bake, longer in cooler temperatures. **Crème fraîche is a french cultured cream similar to sour cream, though the flavor is slightly more mild and delicate. You can make your own quite easily, or substitute sour cream if you're unable to find it.

Chocolate Strawberry Dessert Kabobs

Chocolate Strawberry Dessert Kabobs

If you know me, I’m all about simple, EASY, yet delicious recipes! These dessert kabobs are just that! I first saw these at a baby shower a few months ago and I had to make them at home with my kiddos. They absolutely loved them and they were the perfect treat for them to help in kitchen.
It would be fun to have a whole station set up at a shower/party and let your guests make their own dessert kabobs. You could get creative and have different fruit and different kinds of treats to add like brownies, short cake, rice krispies, marshmallows and donut holes. The possibilities are endless! I’m drooling just thinking about a donut kabob. Must stop now!
Ingredients:
  • 24 strawberries
  • 12 Large marshmallows
  • 12 brownie bites (I bought them pre-made)
  • Hot fudge sauce (or melted chocolate), for drizzling
  • Mini skewers

Directions:
  1. Wash and cut the tops off the strawberries. Place on a paper towel to dry.
  2. Place the strawberry, brownie bite and marshmallow through a skewer (I used these ones). Place on a plate or wax paper.
  3. Warm fudge sauce, or melt chocolate in the microwave. Then drizzle over the kabobs. Place in the refrigerator until ready to serve.

EASY BLUEBERRY PEACH TART WITH VANILLA GLAZE

EASY BLUEBERRY PEACH TART WITH VANILLA GLAZE

Hello my friends, Happy Saturday! Do you have anything fun on the books for this weekend? After last weeks very fun but c-r-a-z-y weekend in Princeton I am looking forward to some rest and relaxation. I’m hoping to finish a book, spend some time at the farmers market, and maybe even squeeze in a light hike on Sunday afternoon. Fingers crossed it’s the mellow few days my heart and mind are after.

Ingredients

  • 1 sheet of puffed pastry, thawed for 20 minutes
  • 1 large egg
  • 1 tablespoon water
  • 3 large peaches, peeled, pitted, and thinly sliced
  • 1 1/2 cups fresh blueberries
  • 1/4 cup granulated sugar
  • 1/4 teaspoon salt
  • 1/4 teaspoon cinnamon
  • 1 teaspoon cornstarch
  • For the Vanilla Glaze:
  • 1 cup of confectioners' sugar
  • 1 teaspoon vanilla extract
  • 2 tablespoons of milk OR heavy cream, more if needed to achieve desired consistency

Instructions

  1. Remove 1 sheet of puffed pastry from the freeze; thaw for 15-20 minutes at room temperature, or until it can easily be unfolded without cracking.
  2. Preheat oven to 400°(F). Line a large baking sheet with parchment paper; set aside.
  3. In a small bowl combine the egg and water; beat until well combined; set aside.
  4. Thinly slice peaches and place them in a large mixing bowl. Add in the sugar, salt, cinnamon, and cornstarch; toss well ensuring all peaches and are coated in the cinnamon sugar mix; set aside.
  5. Gently unfold the puffed pastry. If it does crack, gently press the tears back together and mend with slightly wet fingers.
  6. Place puffed pastry on prepared baking sheet.
  7. Layer the peaches evenly (and very tightly) on the puffed pastry, making 3 tidy rows, leaving a 1" border around the pastry. Sprinkle the blueberries on top.
  8. Lightly brush exposed pastry crust with egg wash.
  9. Bake for 16-18 minutes, rotating once during baking, or until the crust is puffed up and golden brown and the peaches are tender.
  10. While the tart bakes, make the vanilla glaze!
  11. In a small bowl combine the confectioners' sugar, vanilla, and cream; whisk until smooth, adding more cream as needed to reach desired consistency. Drizzle over the tart right before serving.
  12. Serve warm with vanilla glaze and maybe even a scoop of ice cream!?

Notes


Be sure to leave a one inch boarder around the tart, this helps ensure the edges don't get soggy.

Source

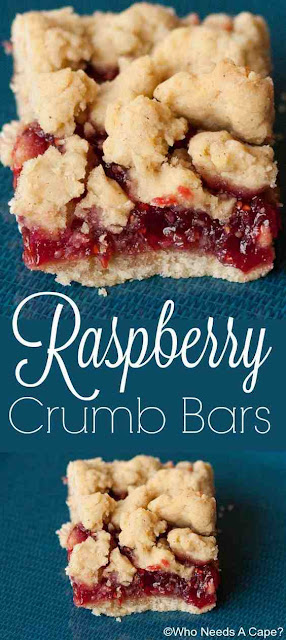
Raspberry Crumb Bars

Raspberry Crumb Bars

Ever since I was little, I have always loved these raspberry 
crumb bars.  I love lightly sweet tart raspberry preserves with the rich buttery crumb crust. These are great for a snack or to send to have out at a party.  Serve with a dollop of vanilla ice cream sprinkles with cinnamon for an extra special treat!  If you are feeling a bit daring try substituting another filling.  These would go great with any berry preserve or perhaps some cinnamon apples or even a can of pie filling.  These would go great with a Gingerbread Latte or a nice piping hot cup of tea!


Ingredients

  • 1 large egg
  • 2 1/2 c all-purpose flour
  • 1 1/4 c butter
  • 1/2 t salt
  • 1 t cinnamon
  • 3/4 cup raspberry preserves


Instructions

  1. Preheat oven to 350℉
  2. Grease an 8 inch square pan.
  3. Mix together all ingredients except the preserves on a slow speed until crumbs form.
  4. Set aside 2 c of the crumb mixture for later.
  5. Press the remaining crumbs into the greased pan.
  6. Spread preserves on top of pressed crumbs.
  7. Sprinkle the remaining crumbs evenly on top.
  8. Bake for 30-40 minutes until the crumbs just start to brown.
  9. Cool and serve.


Source

Individual Rhubarb Tarts With Pistachios, Berries, & Shortbread Crust

Individual Rhubarb Tarts With Pistachios, Berries, & Shortbread Crust

Rhubarb: a fruit, born into the body of a vegetable. While it might look like celery on the outside, it’s what’s inside that counts.
Rhubarb is one of my favorite Spring offerings. Sure, it starts out as a sour, stringy stalk, but with a little help it can do so many things. It makes the most refreshing, pink cocktails this side of blood orange season, its tartness is a welcome ray of sunshine in any dessert, and it’s pretty as all get out. What’s not to love?Also, it makes a mean rhubarb tart. Not that I’m biased, or anything.
INGREDIENTS
For the rhubarb filling (makes about 1 cup):
  • 7oz (about 1¾ cups chopped, or 200g.) rhubarb, cut into ½ inch pieces
  • ½ cup (100g.) granulated sugar, or more to taste
  • ¼ cup water
  • 1 tsp. fresh sqeezed lemon juice, plus more to taste
  • ½ TBSP powdered fruit pectin
For the shortbread crust (makes enough for four 4inch tart shells, with some dough leftover that can be used to make cookies. You might be able to get as many as six tarts out of it, if you try. If you only want to make a couple of tarts, you can halve the recipe):
  • 1¾ sticks (14 TBSP, or 7oz.) unsalted butter, room temperature
  • ½ cup plus 1 TBSP (115g.) granulated sugar
  • 1 tsp. pure vanilla extract
  • ½ tsp. pure almond extract (optional)
  • 1¾ cups (245g) all-purpose flour
  • pinch of fine grain sea salt
  • ½-3/4 cups (2.5 - 3.5oz.) raw almonds, finely chopped (optional -- or roasted and shelled pistachios, or other nuts)
For the Italian meringue (optional -- see recipe notes):
  • 3 large egg whites (about 100ml), room temperature
  • ¾ cup (150g) granulated sugar
  • ¼ cup water
  • ½ tsp. vanilla extract
  • ¼ tsp. lemon juice (or cream of tartar)
Extras:
  • Fresh berries of choice (I used raspberries)
  • Chopped pistachios (or almonds, or other nuts)
  • A few small leaves of mint (optional)
  • Fresh whipped cream (optional, as an alternative to the Italian meringue -- see recipe notes)
INSTRUCTIONS
For the rhubarb filling:
  1. Combine all the ingredients in a large, non-reactive saucepan (ie., stainless steel or nonstick, NOT aluminum or cast iron as metals like these can react with the acids and create an off flavor).
  2. Place over high heat, and bring to a rolling boil, stirring frequently with a wooden spoon. Cook until the rhubarb has broken down, and there are no whole pieces still visible (about 5-8 minutes). Remove from the heat.
  3. You can leave the filling like this, or very carefully puree it with an immersion blender, or regular blender. Always use caution when pureeing hot liquids, as they have a tendency to spatter. If the rhubarb mixture is too shallow in the pot to submerge a stick blender, transfer it to a tall glass measuring cup before pureeing. You can test the puree by dipping a spoon into it and placing it in the freezer for a couple of minutes to cool. If the puree is too tart for your taste, add a bit more sugar. If you'd like it more tart, add a few more drops of lemon juice.
  4. Pour into a clean jar, let cool completely, and store in the fridge until needed. (Puree will keep for up to two weeks. Makes about 1 cup, which is about twice what you'll need for four tarts, but is delicious stirred into ice cream, yogurt, or oatmeal, too.)
For the shortbread crust:
  1. Preheat oven to 350 degrees F.
  2. In the bowl of your mixer, add the butter, sugar, vanilla, and almond extract, and mix on low until evenly combined. Add the flour, salt, and chopped nuts if using, and mix until everything is combined. If the dough seems crumbly, you may need to use your hands to bring it together. Do not over-mix. (You can also make the dough by hand, with a wooden spoon instead of a mixer.)
  3. Take a small lump of the dough and place it into a 4-inch diameter mini tart pan with removable bottom, and press the dough evenly into the bottom and sides. Try to make the dough about an ⅛th-1/4 inch thick all over. Trim any excess from the edges of the tart. Repeat with as many tarts as you'd like to make. (I made four, and had some leftover dough for making cookies later. Leftover dough can be wrapped in plastic and stored in the fridge for up to three days. If you've made the dough in advance and kept it chilled, let it sit at room temperature until it's soft enough to handle.)
  4. With the tines of a fork, prick the bottoms of the tart shells all over, and place in the refrigerator for 40-60 minutes, or until completely firm. Once the dough is thoroughly chilled, place on a baking sheet and bake for 18-20 minutes, or until the edges are golden brown and the center looks dry and lightly golden.
  5. Remove from the oven and let cool completely before filling. (Tart shells can be baked a day in advance, and once completely cooled, stored at room temperature in an airtight container or wrapped in plastic.)
For the Italian meringue:
  1. When you are ready to serve your tarts, make the meringue. Place the egg whites, lemon juice, and vanilla in the bowl of your stand mixer.
  2. In a saucepan, combine the sugar and water. Place over medium-high heat, and cover with a lid. Let cook for 2-3 minutes, then remove the lid and clip on a candy thermometer. You'll want to cook the sugar until it reaches 245 degrees F.
  3. Meanwhile, turn on the mixer to medium speed, and let the egg whites whip until they have reached soft peaks.
  4. As soon as the sugar syrup reaches 245F, remove it from the heat. With the mixer running, very slowly and carefully pour the hot sugar syrup in (if your mixer has a spatter guard, I recommend using it, or be very careful to pour near the edge of the bowl so the hot sugar doesn't land directly on the whisk). Once all the sugar is in, increase the speed to high, and whip until the meringue is glossy, and holds stiff peaks. Transfer the meringue to a piping bag, or a plastic baggy, then snip off one corner for piping. (This will make more meringue than you need, but unfortunately, it's really difficult to make it in a smaller quantity. Extra meringue can be stored in the piping bag at room temperature for up to a few hours, or in the fridge for up to a day.)
To Assemble
  1. Add about 2 TBSP of chilled rhubarb puree to the bottom of a cooled shortbread crust. Garnish with a few fresh berries, some chopped pistachios, almonds, or other nuts, and maybe a leaf or two of mint. Pipe little dollops of meringue, if you've chosen to make some, then use a kitchen torch to toast the meringue to a light golden brown. (Alternatively, you can skip the meringue all together and use fresh whipped cream instead - just don't try to torch it.) Serve!

ONE PAN BALSAMIC CHICKEN AND VEGGIES

ONE PAN BALSAMIC CHICKEN AND VEGGIES

Say hello to one of the EASIEST dinners ever: ONE PAN Balsamic Chicken and Veggies. It’s low on prep time, has few ingredients, and is huge on flavor (while conveniently being super healthy)! There’s a 2-ingredient balsamic glaze which triples as first: a marinade, second: a sauce for cooking, and third: a dipping sauce. This is how I think every dinner should be made 😜. Whisk two ingredients together and use that base three times.

Then the veggies are like empty-out-your-fridge kind of ordeal. Throw them all together on a pan, toss them with some olive oil + seasoning, roast them, and they too seep up some of that delicious balsamic glaze.


INGREDIENTS

  • 2/3 cup basalmic vinegar
  • 2/3 cup zesty Italian dressing, fat free is great
  • 1.25 pounds chicken tenders, or breasts
  • 2 heads broccoli
  • 1 cup baby carrots
  • 1/2 pint cherry tomatoes
  • 1 teaspoon Italian seasoning
  • 3 tablespoons olive oil
  • 1/2 teaspoon garlic powder
  • Optional: fresh parsley, salt and pepper


INSTRUCTIONS

  1. Preheat the oven to 400 degrees F. Spray a large tray with nonstick spray (line with parchment paper if you tray isn't already nonstick or the balsamic + Italian mixture will stick to it) and set aside.
  2. Whisk together the balsamic vinegar and zesty Italian dressing.
  3. Trim the tenderloins of fat and undesired parts. Alternatively cut the breasts into small 1/4th-1/2th inch thick pieces (resemble the size of the tenders in the picture/video)
  4. Place 1/3 cup of the balsamic + Italian mixture in a large bag and add the chicken tenders. Coat and place in the fridge to marinate for at least 30 minutes and up to 6 hours.
  5. Chop the broccoli into small pieces. Slice the baby carrots in half.
  6. Place broccoli + carrots on the prepared tray with the cherry tomatoes (like your tomatoes LESS roasted? Toss in after 5-10 minutes of the broccoli and carrots being cooked. Otherwise they are ultra tender!), Italian seasoning, olive oil, garlic powder, and add some seasoned salt and pepper to taste.
  7. Roast the veggies for 10-15 minutes.
  8. Remove from the oven and flip around. Section the veggies to each side of the tray (see video) and place the chicken tenders (discard marinade) in the center. Brush 1/3 cup of the balsamic + Italian mixture over the chicken.
  9. Return to the oven and cook for another 7-15 minutes depending on the size of your chicken. Be careful to monitor the chicken so you don't overcook it.**The cooking time will largely vary based on the size of your chicken. See the last paragraph of text for more direction on how to cook this meal so everything is done at the same time.**
  10. Serve the chicken and veggies with the remaining Balsamic + Italian mixture. Top with freshly chopped parsley if desired.


Source

Healthy Buffalo Cauliflower Bites Recipe

Healthy Buffalo Cauliflower Bites Recipe

I have been really wanting to try out this healthy buffalo cauliflower bites recipe for quite some time and finally got around to it. I wish I had started making this sooner because it was absolutely delicious. I have seen various versions of this recipe and many of them were quite time consuming. If you are a fellow busy parent that wants to cook up a quick and delicious meal, then you are in the right place!
For this recipe, all you need is to coat your cauliflower in a hot sauce mixture, cook in the oven for 20 minutes and then they are ready to enjoy. YES! They are that simple to make. Super healthy and simple alternative to traditional buffalo chicken bites. Because this recipe is all about saving time and we have narrowed it down to only a few steps, they are not going to be super crispy. You may want to broil them if you are able to keep a close eye on them while they are in the oven.

Ingredients

  • 6 cups of fresh cauliflower florets
  • 2 teaspoons garlic powder
  • a pinch of salt
  • a pinch of pepper
  • 1 tablespoon butter, melted
  • ¾ cup Frank's RedHot hot sauce


Instructions

  1. Preheat oven to 450.
  2. Spray a baking sheet with olive oil. Set aside.
  3. Mix the garlic powder, salt, pepper, melted butter, and hot sauce in a small bowl.
  4. Add the cauliflower into a large gallon-sized bag, pour the buffalo sauce into the bag. Shake until the cauliflower florets are fully coated.
  5. Spread on a baking sheet.
  6. Bake for 20 minutes.
  7. Serve with ranch or blue cheese dressing.


Source

ONE POT CHICKEN ORZO SOUP

ONE POT CHICKEN ORZO SOUP

One Pot Chicken Orzo Soup is a hearty and delicious soup recipe made with wholesome vegetables, chicken, and lemon.  This is comfort food at its best.

Hello there!  The weather has finally cooled off and I am craving some soup. Recently, I made this One Post Chicken Orzo Soup recipe and it is so filling and healthy.  This soup recipe is incredibly easy to make in just one pot.  You can have a hearty and comfort dinner ready in just about 30 minutes.  This soup tastes like chicken noodle soup with a burst of fresh lemon flavor.


Ingredients

  • 2 Tablespoons olive oil
  • 1 white onion, chopped
  • 4 medium carrots, chopped
  • 4 celery stalks, chopped
  • 4 cloves of garlic, minced
  • 1½ pounds boneless, skinless chicken breasts, diced
  • 8 cups chicken broth (plus more if you prefer)
  • 1½ cups dry orzo pasta
  • 2 lemons, freshly squeezed
  • 2 Tablespoons parsley, chopped


INSTRUCTIONS
  1. In a large stock pot, add chopped onion, carrots, and celery along with 2 Tablespoons olive oil. Saute for 5 minutes over medium heat.
  2. Add minced garlic and saute for 2 minutes.
  3. Add diced chicken, broth, and dry pasta. Bring soup to a boil and simmer for 15-20 minutes or until the chicken and pasta is fully cooked. Remove from heat.
  4. Add in lemon juice and parsley. Serve hot.

Source

HONEY MUSTARD CHICKEN, AVOCADO + BACON SALAD

HONEY MUSTARD CHICKEN, AVOCADO + BACON SALAD

Being a number one fan of honey mustard everything, I gave up enjoying honey mustard dressing on salads because of all of the mayo and calories normally sneaking their way into them. Then, this morning happened. Waking up with the strongest honey mustard craving (weird, right?), I smacked myself upside the head when I remembered, um, HELLO, food blogger, remember? Which means, don’t-give-up-anything-just-find-a-way-to-make-it-yourself, type of thing.

INGREDIENTS
Dressing / Marinade:
  • ⅓ cup honey
  • 3 tablespoons whole grain mustard
  • 2 tablespoons smooth and mild Dijon mustard
  • 2 tablespoons olive oil
  • 1 teaspoon minced garlic
  • Salt to season
  • 4 skinless and boneless chicken thighs or chicken breasts

For Salad:
  • ¼ cup diced bacon, trimmed of rind and fat
  • 4 cups Romaine lettuce leaves, washed
  • 1 cup sliced grape or cherry tomatoes
  • 1 large avocado, pitted and sliced
  • ¼ cup corn kernels
  • ¼ of a red onion, sliced

INSTRUCTIONS

  1. Whisk marinade / dressing ingredients together to combine. Pour half the marinade into a shallow dish to marinade the chicken fillets for two hours if time allows. Refrigerate the reserved untouched marinade to use as a dressing.
  2. Heat a nonstick pan (or grill pan or skillet) over medium heat with about a teaspoon of oil and sear / grill chicken fillets on each side until golden, crispy and cooked through. (Grill in batches to prevent excess water being released.) Once chicken is cooked, set aside and allow to rest.
  3. Wipe pan over with paper towel; drizzle with another teaspoon of oil and fry the bacon until crispy.
  4. Slice chicken into strips and prepare salad with leaves, tomatoes, avocado slices, corn, onion strips and chicken.
  5. Whisk 2 tablespoons of water into the remaining untouched marinade / dressing and drizzle over the salad. Sprinkle the bacon over the top and season with a little extra salt and cracked pepper (optional).


One Sheet Pan Shrimp Fajitas

One Sheet Pan Shrimp Fajitas

These One Sheet Pan Shrimp Fajitas are seriously easy and delicious. Scoop these juicy shrimp, tender bell peppers and onions into a soft warm tortilla for a super fast weeknight dinner. The onions and bell pepper are sliced thing so that they cook at the same rate at the shrimp and everything is cooked on just one sheet pan. Finish with a squeeze of fresh lime juice and chopped cilantro for a dinner that is packed with flavor and veggies!

Ingredients
  • 1 1/2 pounds of shrimp, peeled and deveined
  • 1 yellow bell pepper, sliced thin
  • 1 red bell pepper, sliced thin
  • 1 orange bell pepper, sliced thin
  • 1 small red onion, sliced thin
  • 1 1/2 tablespoons of extra virgin olive oil
  • 1 teaspoon of kosher salt
  • several turns of freshly ground pepper
  • 2 teaspoon of chili powder
  • 1/2 teaspoon of garlic powder
  • 1/2 teaspoon of onion powder
  • 1/2 teaspoon of ground cumin
  • 1/2 teaspoon of smoked paprika
  • lime
  • fresh cilantro for garnish
  • tortillas, warmed
Instructions
  1. Preheat oven to 450 degrees.
  2. In a large bowl, combine onion, bell pepper, shrimp, olive oil, salt and pepper and spices.
  3. Toss to combine.
  4. Spray baking sheet with non stick cooking spray.
  5. Spread shrimp, bell peppers and onions on baking sheet.
  6. Cook at 450 degrees for about 8 minutes. Then turn oven to broil and cook for additional 2 minutes or until shrimp is cooked through.
  7. Squeeze juice from fresh lime over fajita mixture and top with fresh cilantro.
  8. Serve in warm tortillas.
Notes
If preferred, remove shrimp tails prior to cooking for easier serving.

LOADED GUACAMOLE VEGETARIAN TACOS HEALTHY RECIPE

Tacos, I think, more than any other savory food, make people happy. Set up a taco bar with lots of fixin’s, and you’ll have one giddy group of peeps. (Ever had a taco party in the summer? Lots of smoky-grilled toppings and free-flowing cocktails/mocktails/beer makes for one feel-good time.)
Trying to cut back on meat these days? Tacos! Those little flour shells hold all kinds of vegetarian goodness with flair equal to meaty counterparts. Grilled portobello mushroom and onion tacos. Yes! Roasted three-pepper tacos with cotija. Woot! White fish tacos with this taco sauce. Oh, hell to the yes.And anything that includes guacamole. I made guac-loaded vegetarian tacos this weekend, and they were everything I ever wanted. I had no choice but to share the delicious loaded guacamole word with all you lovely peeps.
LOADED GUACAMOLE VEGETARIAN TACOS HEALTHY RECIPE
INGREDIENTS
for the guacamole
  • 2 avocados, pit and skin removed, roughly chopped
  • 1/2 of a lime
  • 1/2 of a lemon
  • 1/4 salt (plus extra as needed)
  • 1/3 cup corn kernels (raw, from about 1/2 of a large cob, or thawed from frozen)
  • 1/4 cup red bell pepper, diced
  • 2 tablespoons diced poblano pepper
  • 1 tablespoon diced red onion
  • 1 tablespoon diced jalapeño pepper
  • 2 teaspoons minced cilantro
  • 1 clove garlic, minced
for the black beans
  • 1 can black beans (15 ounces)
  • 1/3 cup corn kerns (raw, from 1/2 of a large cob, or thawed from frozen)
  • 1/4 cup red bell pepper, diced
  • 1/4 cup poblano peppers, diced
  • 1/2 teaspoon ground cumin
for the tacos
  • 6 small flour or soft corn tortillas
  • 2 cups chopped iceberg or romaine lettuce
  • 1 tablespoon minced cilantro
  • hot sauce, such as Cholula or Sriracha (optional)
  • lime and/or lemon wedges
INSTRUCTIONS
prepare the guacamole
  1. Mash the avocado in a medium bowl with a fork (or molcajete) until it reaches your desired consistency, chunky or smooth. Add a small squeeze each of lime and lemon juice, along with 1/4 teaspoon salt. Mix well and taste. Add more lime juice, lemon juice, and salt as you like. Stir in the remaining guacamole ingredients. (To make ahead, cover the bowl with plastic wrap and press gently against the guacamole. The entire surface of the guac should be touching and covered by the wrap, to keep air out. Then, cover the bowl with a second sheet of wrap, and refrigerate.)
prepare the black beans
  1. Add all of the black bean ingredients to a 2 quart sauce pot and heat over medium-low until hot. Turn off the heat and allow to cool to a very warm, eatable temp (a few minutes should do it).
assemble
  1. If the tortillas are not soft and pliable (or if you like your tortillas warm), stack them on a microwaveable plate, separated with paper towels, and heat for 20 to 30 seconds.
  2. Line half of each tortilla with lettuce. Spoon the black bean mixture over the lettuce (on half of the tortilla). Spoon guacamole on the other half. Top with a few shakes of hot sauce (optional) and a sprinkle of cilantro. Serve with lemon and lime wedges.